The TzHaar Fight Cave is among the hardest minigames in RuneScape. To fully complete this minigame, the player must have high Combat skills and effective equipment.
If the player clicks log out while fighting in the caves, they would automatically be logged out at the end of the wave. Logging out manually before that means they have to repeat the wave.
The general approach to the Fight Cave is by using Ranged. This will allow the player to trap monsters and attack them from a distance. Using Range gives by far the largest chance of success. Using only Melee is a more difficult method, which will give you a low chance of winning. A combination of Range and Guthan's equipment can be very strong and reduce/eliminate the need of food.
Playing this activity until the end takes a considerable amount of time and resources, requiring usually 2 hours of continuous playing and a considerable number of potions. The time taken to complete the waves can be an annoyance for high-levelled players that consistently fail to activate the correct protection Prayer in the final wave. While experienced players can take less than half an hour to reach Jad, beginners and those with low Ranged levels might struggle and take several hours to reach Jad.
Recommended skills
For the Fight Cave, there are no skill requirements. It is, however, recommended that the player has at least the following stats before attempting the Fight Cave. Recommended stats may vary according to the method of combat chosen. In addition to this, lower stats are still possible, assuming the player has experience in the Fight Cave.
| Skill | Ranged Method | Void Method | Ranged & Guthan's Method | Pure Method | Melee Method | Tank Method | Magic Method |
|---|---|---|---|---|---|---|---|
| File:Ranged-icon.png | 75 | 75 | 75 | 80 | N/A | 80+ | N/A |
| File:Hitpoints-icon.png | 75 | 75 | 75 | 80 | 85+ | 85 | 75 |
| File:Prayer-icon.png | 60 | 43 | 60 | 43 | 75+ | 75+ | 43 |
| File:Defence-icon.png | 70 | 42+ | 70 | < 20 | 90+ | 90+ | 40+ |
| File:Attack-icon.png | N/A | 75 | 70 | N/A | 90+ | N/A | 30+ |
| File:Strength-icon.png | N/A | 42 | 70 | N/A | 90+ | N/A | N/A |
| File:Magic-icon.png | N/A | 80/92 | N/A | N/A | 94 | N/A | 90+ |
- If you decide to go with Melee, 94 Magic is advised (for Vengeance) but not needed.
- Additionally, if you want to heal with Blood Blitz or Blood Barrage, 80 or 92 Magic is required respectively.
- Also, if you decide to go with Broad bolts, 55 Slayer is required to use them.
- Lastly, 75 Attack is required to wield all melee weapons up to Godswords if intending to use.
Choosing your weapon
![]() Toxic blowpipe
Toxic blowpipe
Requiring 75 Ranged, the toxic blowpipe is very effective against all enemies in the fight caves. Despite being less accurate and having a smaller max hit than crossbows, the overall damage output is much higher due to its faster attack speed. In addition, the venom can add some extra damage on some of the higher leveled enemies. Mithril darts or higher are recommended.
![]() Twisted bow
Twisted bow
Although extremely effective against Ket-Zek and Jad, the very high price of the twisted bow as well as its lower effectiveness against the lower level enemies make it a less viable option for most players. Nonetheless, if the player can afford it, it is definitely worth to bring along for the later half of the caves.
![]() Rune crossbow
Rune crossbow
The rune crossbow is a powerful and very cheap Ranged weapon. It is the third strongest tradeable and non-degrading crossbow requiring a Ranged level of 61 to use. It fires semi-slow but can hit high and is quite accurate. It fires bolts - for the Fight Cave, about 1500 adamant bolts or broad bolts are recommended. Furthermore, one can wield an Ava's accumulator in the cape slot when using this weapon, and the bolts can be picked up and reused, thus making this weapon a good choice.
![]() Armadyl crossbow
Armadyl crossbow
The Armadyl crossbow is an alternative for people with 70 Ranged and wealth, and it is the best crossbow in RuneScape. It is slightly more accurate and shoots farther than a rune crossbow, meaning you can get through the Fight Caves a bit faster and safer. It also has a special attack, Armadyl Eye, which doubles the player's overall accuracy for one shot.
![]() Karil's crossbow
Karil's crossbow
For players with 70 Ranged or higher, Karil's crossbow is an option. It has a Ranged attack bonus almost as high as the Rune crossbow. However, this weapon fires much faster - just as fast as a shortbow would hit. This weapon fires bolt racks instead of bolts. The max hit of this crossbow is less than a Rune crossbow, but it can still inflict the most damage per second of any non-PvP Ranged weapon. Downsides to using this weapon are that it is two-handed, the bolt racks disappear upon use, and the ammunition costs around 50-80gp per bolt rack.
![]() Crystal bow
Crystal bow
Another Ranged weapon requiring the Roving Elves quest, 70 Ranged to use, and 50 Agility as well, is the crystal bow. This bow degrades when used. When fully charged, it has a Ranged attack bonus surpassing that of the Rune crossbow. It is also faster, attacking with the speed of a longsword. It would be wise to take two fully charged bows into the Fight Cave. For every 250 shots fired, the Crystal bow currently wielded will degrade, decreasing its stats. It is highly recommended to imbue your Crystal bow so its stats do not decrease as it degrades throughout the cave. After 2500 shots are fired, the bow will revert to a crystal seed. If one fires 200 - 240 shots and then swaps to the second bow, the second will degrade and the first one will still have the maximum stats. The player should switch back to the first bow, after another 200 - 240 shots, use the degraded bow to take in the next degradation, and repeat these steps. The price of using this weapon varies greatly since the more bows the player has recharged, the lower the price. This means this weapon will cost between 360 and 72 coins per shot.
![]() Guthan's warspear
Guthan's warspear
If the player chooses to use Guthan's equipment, they must take this weapon as well as the other set pieces for the set effect, Infestation, to activate. Successful attacks will have a chance of healing the player for the amount of damage they did. This can be very helpful as it will conserve a lot of potions. The warspear is, however, a melee weapon so one must come out of their safespot and run towards the monsters to use it. It is also two-handed, so no shield can be wielded alongside the spear. When one starts the Fight Cave with a full inventory and both a weapon and a shield equipped, the warspear can't be used until an inventory spot is freed up. The use of Guthan's warspear will actually take up 4 inventory spots, since the other pieces of Guthan's are also needed. Note that the set effect will only randomly activate, so one should not rely on restoring health with Guthan's when they have very few hit points left.
![]() Saradomin godsword
Saradomin godsword
Higher levelled, wealthy players may find that the Saradomin godsword is a useful secondary weapon to bring into the caves. Level 75 Attack is needed to use the weapon. Its special attack, Healing Blade, will restore half the amount of damage they did to their Hitpoints and 1/4 to their Prayer points and decrease the amount of potions needed. The special attack drains 50% of the special attack energy. Despite some of the lower levelled creatures having only 10 or 20 hit points, players can still heal the equivalent to what they would have hit should the given monster have had more health. Players will be able to use the special attack once per wave after roughly Wave 20. The godsword should be used for its special attack only - for normal killing, the player should use a Ranged weapon. One good tactic is to kill the strong monsters first, and save a Tz-Kek for last to use the special attack on. Other godswords are, to a lesser extent, also useful in the Fight Cave.
![]() Dragon halberd
Dragon halberd
Only for players who have completed the Regicide quest, the Dragon halberd can be a cheap yet effective 'last resort' weapon for players who don't want to use Ranged and don't have a lot of money to spend. It is a melee weapon that can strike from two squares away out of range of the monsters' melee attacks. The halberd has a special attack, Sweep, that drains 30% of one's special attack energy. This attack can strike multiple opponents in multi-combat areas if they are lined up properly next to each other. Against large monsters, this special attack will hit twice. For some players, this could be a strong weapon; it may, however, be difficult to use - for example, if one runs a little bit too close to a Ket-Zek, he or she could get hit by its melee attacks and quickly die.
Setups and methods
Ranged-only method
The simplest method to use is the Ranged-only method. The Ranged-only setup involves using only Ranged all the way through to the end. This is, perhaps, harder than using Guthan's equipment as well as Ranged as more food and potions are required, and more damage is taken. However, it isn't very difficult to make it to the end using only Ranged, and it is a good alternative to people who don't want to use Guthan's. As the player will be taking more damage, it is highly recommended he or she maximises his or her Defence bonus (especially against slash and Ranged to help defend against Tok-Xil and Yt-HurKot) as well as Prayer and Ranged attack stats.
Pros
- This method is cheap and simple.
- No inventory slots will be occupied by armour pieces.
Cons
- As you will require more potions to restore your HP, this method is usually harder than using Guthan's.
Recommended equipment
Note: The higher your Defence level, the less you need protective gear like Karil's leathertop or leatherskirt.
Recommended inventory
- 2-3 ranging potions (4)
- 6-8 Saradomin brews (4)
- Fill rest of slots with super restores or prayer potions (4), but you should have at least 1 restore to counteract the brews' effects on a 1:3 ratio of restores to brews (i.e. 3 doses of brew requires 1 dose of restore to counteract the effect of brews).
- Purple sweets (stackable food, heals 1-3 HP) - optional
- Saradomin Godsword also helps a lot (reduces the need to use Saradomin brews and prayer potions)
- 250 diamond bolts (e) (when ranging TzTok-Jad)
- Note: If you find you don't need to heal often, for example, you use a Saradomin godsword, or if you are a higher-levelled Defence/Combat, consider the cheaper inventory of 4 Saradomin brews, 4 Super restores, 3 Ranging potions, and for the rest of your inventory, Prayer potions. This will radically save money, and each trip may cost a third or less of your initial funding.
- Note: This is only a recommended inventory setup and will always vary between each player.
Void method
Wearing the full Void Knight set, yields a 10% bonus to damage and 10% to accuracy. It requires 42 Attack, Strength, Defence, Ranged, Magic, Hitpoints and 22 Prayer. Also, the Melee helm can be brought along in the inventory if one wishes to use Melee within the caves with a Saradomin godsword or something similar. Alternatively, the Mage helm can also brought if one wants to use Blood Blitz or Blood Barrage to heal.
Pros
- Void's set effect gives +10% damage to Ranged, +10% to Melee, +10% accuracy for both Ranged and Melee and +45% to Magic accuracy according to the helm worn, which allows better hits.
- It has no negative effects.
Cons
- A decent shield might be required to help offset its low Defence bonuses.
Recommended equipment
| Slot | Most effective -> Least effective | ||||
|---|---|---|---|---|---|
| Void ranger helm | |||||
| Amulet of Fury | Amulet of Glory | Necklace of anguish | Stole | ||
| Elite void top | Void knight top | ||||
| Elite void robe | Void knight robe | ||||
| Pegasian boots | Blessed boots | Bandos boots | Dragon boots | ||
| Ava's device | Trimmed Ranging cape | Vestment cloak | Regular Ranging cape | ||
| Odium ward | Crystal shield (imbued) or Blessed spirit shield | Toktz-ket-xil or Granite shield | Book of law or Unholy Book | ||
| Void Knight gloves | |||||
| Archers' ring (i) | Archers' ring | Ring of suffering (i) | Ring of the gods (i) | ||
| Armadyl crossbow or Toxic Blowpipe | Karil's crossbow | Rune crossbow | Magic shortbow (i) | ||
| Broad bolts (for Cave), diamond bolts (e) (for Jad) | Adamant darts or better (for cave), dragon dart (for Jad) (only if using toxic blowpipe) | Bolt racks (only if using Karil's crossbow) | Rune arrows (only if using a magic shortbow) | ||
- ↑ Switch to Void melee helm if looking to Melee or Void mage helm for Magic, but this is completely optional as Void ranging will do just fine alone.
Recommended inventory
- Special attack weapon (optional)
- Void melee helm and/or Void mage helm (optional)
- A spare crystal bow (only if using one)
- Diamond bolts (e) / broad bolts (optional, and only if using rune crossbow/Armadyl crossbow)
- 2 ranging potions (4)
- 6-9 Saradomin brews (4)
- 2-3 super restores (4)
- 1000 Blood Blitz/Blood Barrage casts (optional, and for healing)
- Fill any open inventories with prayer potions (4)
- Note: Reduce the amount of brews and restores if you plan to use Guthan's (as indicated in the Guthan's Method) during the Fight Cave, but keep the 3:1 ratio of brews to restores. Swap the super restores for prayer potions to reduce inventory cost. Also, sub out 3 potions for Blood Blitz or Blood Barrage runes if looking for an alternate way to heal, and bring the Void mage helm to get the 30% bonus to Magic accuracy.
Guthan's method
Many players use Guthan's armour in the early waves (Waves 1-14) as it helps conserve food, and it also has reasonable Defence. Guthan's armour will at random - during some of your attacks - heal you for the amount of damage you deal. Players would normally use Guthan's until the Yt-MejKots appear (on Wave 15+), in which the player would then switch to their Ranged setup. However, they could still heal on monsters in later waves to replenish their health when needed. Ideal monsters to heal on are Tz-Kek (level 45), and Tok-Xil (level 90). In the later waves with Ket-Zek attacking you, you should run though the Tok-Xil to trap the Yt-MejKots while melee'ing the Tok-Xil. Yt-MejKots are also ideal to heal on if you are using a safe spot, such as Italy or Dragon Rock. This is done by hiding in the safe spot, hitting Yt-Mejkot, and running back to the safe spot. It should be noted that when you run back to your safe spot, you should wait until its HP bar goes away so it will not attack you.
Pros
- Guthan's equipment will heal you when melee'ing, so fewer, if any, Saradomin brews, food or other healing will be needed.
- Using Guthan's and Ranged is usually easier than using Ranged alone.
Cons
- Some inventory slots will be occupied by armour pieces (however, the amount of HP restored by Guthan's more than makes up for the few potions lost).
- Changing armours can be difficult for inexperienced players.
Recommended equipment
- ↑ 1.0 1.1 1.2 Switch to Guthan's platebody, chainskirt and warspear when you need to heal.
Recommended inventory
- Guthan's helm (if using some other helm)
- Guthan's platebody
- Guthan's chainskirt
- Guthan's warspear
- A spare Crystal bow (only if using one)
- Odium ward / Crystal shield (imbued) / Blessed spirit shield / Toktz-ket-xil / Granite shield (only if using Rune/Armadyl crossbow)
- 1 ranging potion (4)
- 3-6 Saradomin brews (4)
- 3-6 super restores
- Fill remaining inventory spots with prayer potions (4)
Tank method
By taking advantage of the high Ranged bonus weapons such as the Armadyl crossbow or an imbued Crystal bow, a player can equip chest and leg protection that offer very high Defence bonuses, such as Barrows equipment. This will allow players to have a decent range bonus, but be able to tank most hits from Tok-Xil. In addition, if one does not feel up to luring healers at the boss fight, the added Defence will allow them to simply stand there and tank them.
Pros
- Reduced consumption of Prayer/super restore potions and Saradomin brews.
Cons
- Will hit less and do less damage due to negative ranged bonus from armor.
- Appropriate gear can be very expensive, especially if one wants the best Ranged attack bonus as well as high Defences.
- Essentially not worth doing since the armor needed would outweigh the cost of the supplies used and the amount of damage per second you sacrifice outweighs the the amount of defense you're gaining. This means you'll take less damage but you will be exposed to whats causing the damage for longer, essentially negating the effect unless you're lucky.
Recommended equipment
Recommended inventory
- Guthan's helm
- Guthan's platebody
- Guthan's chainskirt
- Guthan's warspear
- A spare crystal bow (only if using one)
- Dragonfire shield / Crystal shield / Toktz-ket-xil / Granite shield (optional, and only if using Rune/Armadyl crossbow)
- Diamond bolts (e) / broad bolts (optional, and only if using rune crossbow/Armadyl crossbow)
- 3-4 ranging potions (4)
- 7-9 Saradomin brews (4)
- 13-15 super restores (4)
- Fill any open inventories with prayer potions (4)
- Note: Reduce the amount of brews and restores if you plan to use Guthan's during the Fight Cave. Swap the super restores for prayer potions to reduce inventory cost, but keep the 3:1 ratio of brews to restores (e.g. 9 brews and 3 restores).
Jad Melee method
Some players choose to fight Jad using Melee. To do this, players have to have Protect from Melee on and switch to Protect from Missiles/Protect from Magic depending on what Jad uses, and then immediately switch back to Protect from Melee because his melee attack is too quick, and if he doesn't use Melee, you just switch again. It is advised to have 90+ Melee stats along with 90+ Hitpoints and 70+ Prayer with Piety when attempting this method. Using Super attacks and strengths will greatly speed up the kill.
Pros
- Fight Cave is heavily sped up and can be as fast as approximately 45 minutes to 1 hour.
- The first 30 waves are generally faster than using Ranged.
Cons
- Due to the fact that you're in melee range, that gives Jad another attack style to use making prayer flicking harder.
Recommended equipment
| Slot | Most effective -> Least effective | |||
|---|---|---|---|---|
| Serpentine Helm/Slayer Helm(i) | Helm of Neitiznot | Verac's Helm | Torag's or Dharok's Helm | |
| Amulet of fury | Amulet of glory | Amulet of torture | Amulet of strength | |
| Bandos chestplate | Guthan's platebody | Verac's brassard | Torag's platebody or Dharok's platebody | |
| Bandos tassets | Verac's plateskirt | Torag's platelegs or Dharok's platelegs | Guthan's chainskirt | |
| Dragon boots | Bandos boots | Rune boots | Climbing boots | |
| Fire cape | Trimmed skillcape | Vestment cloak | Regular Skillcape or Obsidian cape | |
| Dragonfire shield | Crystal shield (imbued preferred) | Toktz-ket-xil or Granite shield | Dragon defender | |
| Barrows gloves | Dragon gloves | Rune gloves | Adamant gloves | |
| Berserker ring (i) | Berserker ring | Warrior ring (i) (only if using a slash weapon) | Ring of suffering (i) | |
| Abyssal whip or Abyssal tentacle | Abyssal dagger | Zamorakian hasta | Saradomin sword or Saradomin's blessed sword | |
| Armadyl godsword (for Jad) | Saradomin godsword (for Cave) | Dragon halberd | Dragon dagger (P++) | |
Another strategy used when Melee'ing is casting the Vengeance spell. This is only recommended for higher level players. You attack Jad the same way as normal (using abyssal whip first hit, use Armadyl godsword special attack twice then back to the whip) but after the Armadyl godsword specials, use your Vengeance spell. When Jad goes to switch from Magic to Melee/Ranged, he will end up killing himself or knocking himself down to under 20 HP. When doing this method, it is advised you have 90+ Hitpoints and keep your Hitpoints above 80 at all times.
Recommended inventory
- 3-4 ranging potions (4)
- 7-9 Saradomin brews (4)
- 13-15 super restores (4)
- 3 spaces for runes (1 if using a rune pouch) if you plan to use Vengeance
- Fill any open inventories with prayer potions (4)s
- Note: Reduce the amount of brews and restores if you plan to use Guthan's during the Fight Cave. Swap the super restores for prayer potions to reduce inventory cost, but keep the 3:1 ratio of brews to restores (e.g. 9 brews and 3 restores).
Magic-only method
It's strongly recommended to have at least 90 Magic and access to strong Ancient Magicks spells like Blood Barrage. Additionally, wear the best Magic armour possible such as Ahrim's armour or use Void equipment, and equip a good staff like a fully charged Trident of the swamp. Although in theory Magic may seem [like] a good approach to beat the Fight Caves and its bosses, it is generally not advised unless your Magic level is high enough to use the more devastating spells, or if you can afford the vast quantity of runes required to succeed.
Also, if using the Void Method, wearing the Void mage helm, robe top, skirt, and gloves, yields a 30% bonus to Magic accuracy. It requires 42 Attack, Strength, Defence, Ranged, Magic, Hitpoints and 22 prayer.
Pros
- No inventory slots will be occupied by armour pieces.
Cons
- It can be quite expensive, slow, and tedious.
- A decent shield might be required to help offset the low Defences of magical armour.
Recommended equipment
Recommended inventory
- 6-9 Saradomin brews (4)
- 2-3 super restores (4)
- Runes for the spell you're casting (2000-2500 times)
- 1000 Blood Blitz/Blood Barrage casts (optional, and for healing)
- Fill any open inventories with prayer potions (4)
Pure method
This method is meant for pures only. Regular players should use one of the above methods instead.
If you are a pure and you have a Defence level of 20 or below, playing this activity is very hard and expensive, but not impossible. It is recommended to study the Fight Cave and many guides before attempting if you are not experienced. You will be hit very hard by the level 90s. When the healers appear in the last wave, it is recommended to use the Steel Skin prayer to aid your low Defence against them for a short period of time.
Pros
- For this method, no high Defence level is required.
Cons
- This method is very expensive and hard; it is advised to not use this method.
Recommended equipment
| Slot | Most effective -> Least effective | |||
|---|---|---|---|---|
| Any Mitre | Robin hood hat | Initiate sallet (if 20 |
Bearhead or any Halo (if 1 | |
| Amulet of Fury | Amulet of Glory | Stole | ||
| Any Vestment robe top | Monk's robe top | Initiate hauberk (if 20 | ||
| Black d'hide chaps | ||||
| Ranger boots | Holy sandals | Iron boots | Fancy/Fighting boots | |
| Ava's device | Fire cape | Trimmed skillcape | Vestment cloak | |
| Book of law | Unholy book | Book of balance | Holy book | |
| Adamant gloves (if 20 |
Regen bracelet | Mithril gloves (if 1 |
Combat bracelet | |
| Archers' ring (i) | Archers' ring | Ring of suffering (i) | Ring of the gods (i) | |
| Armadyl crossbow / Toxic blowpipe | Karil's crossbow | Rune crossbow | Magic shortbow (i) | |
| Broad bolts or better (for Cave), diamond bolts (e) (for Jad) | Adamant darts or better (for cave), dragon darts (for Jad) (only if using blowpipe) | Bolt racks (only if using Karil's crossbow) | Rune arrows (only if using a magic shortbow (i)) | |
Recommended inventory
- 12 Saradomin brews (4)
- 300+ purple sweets
- 14-15 super restores (4)
- 1-2 ranging potions (4)
- Dragon darts or diamond bolts (e) for Jad
For void and berserker pures:
Consider using proselyte armour (legs and helm) in conjunction with blessed dragonhide armour (body and boots) to maximize prayer bonus and reduce incoming damage from Tok-Xil. If proselyte armour is not available to you, use blessed hides or rune. If you choose to prioritize ranged attack over ranged defense, it is recommended that you use the above inventory rather than the one below.
Recommended inventory
- 8 Saradomin brews (4)
- 300+ purple sweets
- 14-16 super restores (4)
- 1-2 ranging potions
- Dragon darts or diamond bolts (e) for Jad
Note: The healers that appear when Jad has reached half health can be extremely dangerous, even for void and berserker pures. If you are inexperienced in the fight caves, you will die. If one is unable to use the Italy rock to keep all healers on the opposite side of Jad, one must kill the healers or run through Jad (east-west/west-east). Running through Jad is extremely difficult. An easier option for limiting the lethality of the healers is to bring a small amount of black chinchompas to use on the healers. If auto-retaliate is enabled, one will only have to monitor prayers and health. Also, the range of chinchompas when using the rapid attack style is comparable to a crossbow. Users of the toxic blowpipe will be able to avoid using long-range, and avoid any unwanted defense experience gain. Switch to your black chinchompas after a prayer switch when Jad is nearing half-health. You must still target each healer as Jad is too large for the chinchompas' area of effect. Switch back to your main weapon to finish Jad off.
The battle itself
Monsters
In this activity, players must battle past waves of six types of monsters ranging from level 22 up to level 360, before facing the final boss, TzTok-Jad. Each of these monsters require a different tactic by the player, though, due to the structure of the activity, most of them are best fought from a distance. The monsters generally have high Attack and Strength, along with a special ability, but low Hitpoints and Defence. This means they will hit hard and often, but can be killed quite easily.
The monsters appear in waves, 63 in total. Here is a detailed breakdown. The monsters are referred to by their Combat levels. Monsters in the Caves continue to "stack" in a way. For example, after facing two Yt-MejKots, you will face a Ket-Zek (wave 31). From the first Ket-Zek you fight, they will keep appearing until wave 62, when two Ket-Zeks will appear.
Monsters should be killed based on their threat to the player: Tz-Kihs, then Tok-Xils, then Ket-Zeks, then Yt-MejKots, and finally Tz-Keks.
It is very important to note that when two of the same monster appears, one of them will be discoloured. This discoloured monster will serve as a "way point" for the next monster in line to spawn there. For example, when two Ket-Zeks appear, one of them is coloured orange; this orange Ket-Zek's spawn point will be the next monster, in this case, TzTok-Jad's, spawn point. If you log out on this wave (wave 62) the spawn point for the orange Ket-Zeks will change, making it so you can repeatedly log out until you get the spawn point you want for TzTok-Jad to make the fight easier.
Full Guthan's with Protect from Melee activated if needed can be used to heal you as long as any major threat, such as the 360, is vanquished. Since the 360 has deadly Magic and Melee attacks, be sure to kill it with Protect from Magic. Waves 1-30 are excellent for healing and Melee'ing at high Combat level, but Waves 31-61 can also be used to heal provided the 360 is killed first. Wave 61 is the last opportunity to heal using Guthan's.
| Wave | Combat levels |
|---|---|
| 1 | 22 - Kill using a hit-and-run tactic to prevent its Prayer drain. |
| 2 | 22, 22 - Again, hit and run! |
| 3 | 45 - This spawn will be the same as the orange 360 on wave 62 and the same spawn as Jad. |
| 4 | 45, 22[1] |
| 5 | 45, 22, 22[1] |
| 6 | 45, 45 |
| 7 | 90 - Activate Protect from Missiles against Tok-Xil if needed as its Ranged attack will be strong against a low level or mage. [2] |
| 8 | 90, 22[1] |
| 9 | 90, 22, 22[1] |
| 10 | 90, 45 |
| 11 | 90, 45, 22[1] |
| 12 | 90, 45, 22, 22[1] |
| 13 | 90, 45, 45 |
| 14 | 90, 90[2] |
|
Use smaller monsters, Italy Rock or Dragon Rock to block the towering Yt-MejKots (180's). See this map! [3] | |
| 15 | 180 - Again, block the towering Yt-MejKot, or heal off it with Guthan's using Protect from Melee if necessary. |
| 16 | 180, 22[1] |
| 17 | 180, 22, 22[1] |
| 18 | 180, 45[3] |
| 19 | 180, 45, 22[1] |
| 20 | 180, 45, 22, 22[1] |
| 21 | 180, 45, 45[3] |
| 22 | 180, 90 |
| 23 | 180, 90, 22[1] |
| 24 | 180, 90, 22, 22[1] |
| 25 | 180, 90, 45 |
| 26 | 180, 90, 45, 22[1] |
| 27 | 180, 90, 45, 22, 22[1] |
| 28 | 180, 90, 45, 45[3] |
| 29 | 180, 90, 90 - Activate Protect from Missiles against the Tok-Xils if needed as their Ranged attacks will be strong against a low level or mage. |
| 30 | 180, 180 - As soon as you finish off the last 180, immediately activate Protect from Magic. |
|
From this point onwards, use Protect from Magic against the Ket-Zeks (360's), and disable Auto Retaliate. [4] | |
| 31 | 360 - Keep your distance as its Melee attack can deal devastating damage to a player within its range. The Hit-and-Run could work, but it's not advised for the inexperienced. |
| 32 | 360, 22[1] |
| 33 | 360, 22, 22[1] |
| 34 | 360, 45 |
| 35 | 360, 45, 22[1] |
| 36 | 360, 45, 22, 22[1] |
| 37 | 360, 45, 45 |
| 38 | 360, 90 |
| 39 | 360, 90, 22[1] |
| 40 | 360, 90, 22, 22[1] |
| 41 | 360, 90, 45 |
| 42 | 360, 90, 45, 22[1] |
| 43 | 360, 90, 45, 22, 22[1] |
| 44 | 360, 90, 45, 45 |
| 45 | 360, 90, 90 - Take out the rangers first. |
| 46 | 360, 180 - Block the 180 with the 360, Italy or Dragon Rock, or other monsters when they spawn. [3][4] |
| 47 | 360, 180, 22[1][4] |
| 48 | 360, 180, 22, 22[1][4] |
| 49 | 360, 180, 45[4] |
| 50 | 360, 180, 45, 22[1][4] |
| 51 | 360, 180, 45, 22, 22[1][4] |
| 52 | 360, 180, 45, 45[4] |
|
Remember the '29314' killing order! | |
| 53 | 360, 180, 90[4] |
| 54 | 360, 180, 90, 22[1][4] |
| 55 | 360, 180, 90, 22, 22[1][4] |
| 56 | 360, 180, 90, 45[1][4] |
| 57 | 360, 180, 90, 45, 22[1][4] |
| 58 | 360, 180, 90, 45, 22, 22[1][4] |
| 59 | 360, 180, 90, 45, 45[4] |
| 60 | 360, 180, 90, 90 - Kill the rangers first! |
| 61 | 360, 180, 180[3] - This is the last wave to heal using Guthan's. Activate Protect from Magic for the next wave. |
| 62 |
360, 360 - Before you kill the second level 360, drink potions to restore your HP and Prayer. Turn Protect from Missiles on immediately after the second level 360 is dead, and run to this area. This is because there is no initial range sound prior to Jad hitting you whereas Jad's magic attack sounds like activating a Retribution prayer. Please note that Tz-Tok-Jad will spawn wherever the orange Ket-Zek spawns. |
| 63 | 702, (108, 108, 108, 108) - Quickly run into the northeast area near the exit with Protect from Missiles on, and hope Jad gets trapped behind Italy Rock on the east. Jad uses Ranged by stomping his feet to the ground emitting cracks in an earthquake-like manner. He also attacks with Magic by growling, rearing up and dangling his forelegs before discharging a fireball as shown below.
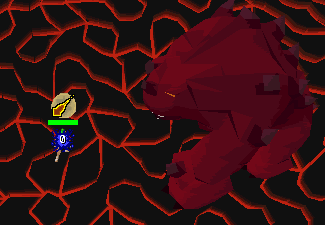 Four level 108 healers will appear when Jad is at half health, so attack each one from long range and drag them away from Jad while staying focused on Jad's footwork and attacks. If they've healed TzTok-Jad back to full health and are then killed, they will respawn; otherwise, not. They don't have to be killed to complete the Fight Cave. |
The progression can be summarized as follows: if a wave has two of the same monster, the next wave will replace those monsters with one monster of the next higher level; e.g.: "22, 22" becomes "45", "90, 90" becomes "180", and so on. If all monsters have different levels, another Tz-Kih (22) appears. The running total of monsters is: 48 Tz-Kih (22), 40 Tz-Kek (45) [80 Tz-Kek (22)], 36 Tok-Xil (90), 34 Yt-MejKot (180), 33 Ket-Zek (360), 1 TzTok-Jad (702), 4 Yt-HurKot (108).
The order in which you should kill the monsters is:
- Tz-Kih (level 22)
- Tok-Xil (level 90)
- Ket-Zek (level 360)
- Yt-MejKot (level 180)
- Tz-Kek (level 45 and 22)
Note: If there are monsters in the wave that were able to get trapped behind a rock, it is best to stay behind that rock and defeat the monsters you can access from there, before moving onto the monsters who are trapped, thus minimising the number of monsters you have to worry about at one time. The monsters are in order of appearance by wave number:
| First Wave | Level | Name | Hitpoints | Attack style | Max hit (approx.) | Notes |
|---|---|---|---|---|---|---|
| 1 | 22 | 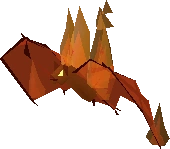 |
10 | File:Attack-icon.png Melee | 4 | Despite its low Combat level, this monster is usually the player's first priority to kill, unless it is trapped behind an object or other monster. Drains File:Prayer-icon.png Prayer points when in Melee range by 100% of damage done + 1 Prayer point (so it will drain at least 1 point per attack). |
| 3 | 45 | 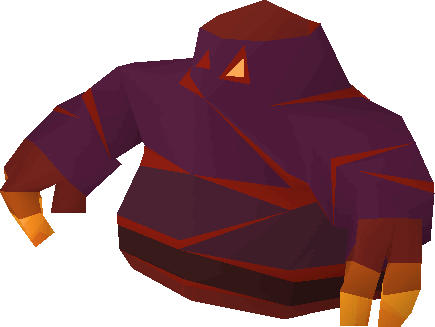 |
20 | File:Attack-icon.png Melee | 7 | A small Melee fighter. Inflicts 1 HP of recoil damage when hit by any melee attack. The least dangerous monster in the cave, so this should be a player's lowest priority to kill. Can't hit very high and is not accurate. When it dies, two level 22 Tz-Keks take its place. |
| 3 | 22 |  |
10 | File:Attack-icon.png Melee | 4 | Two of these appear when a level 45 Tz-Kek is killed; they do not have the recoil effect. |
| 7 | 90 | 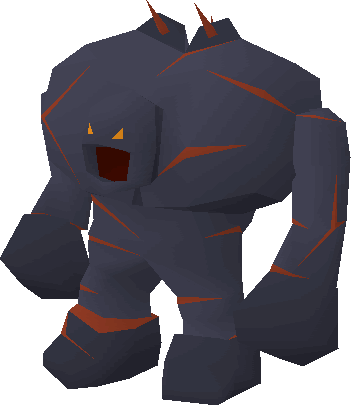 |
40 | File:Ranged-icon.png Ranged, File:Attack-icon.png Melee | 13 | An accurate Ranged fighter that can deal devastating damage. The player's second priority to kill unless the Tz-Kih is trapped behind an object or monster. Praying against these in the early waves is advised. Later on, Prayer must be used against the Ket-Zek's Magic attacks instead, so these should be killed soon. When unable to pray against Ranged attacks, the player could walk up to Melee range to attack this monster since its Melee attacks are weaker. The Ranged and Melee attacks of this monster look similar. If Guthan's is owned, these can be dealt with very easily and without the use of Prayer. |
| 15 | 180 | 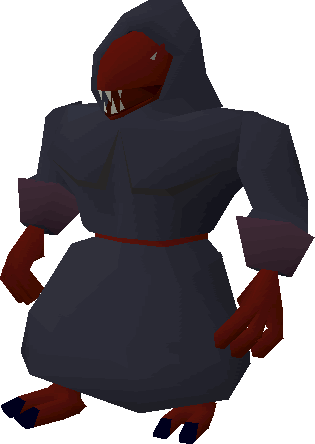 |
80 | File:Attack-icon.png Melee | 28 | A slow Melee fighter; the player's fourth priority to kill. Can easily be trapped behind a rock or a Ket-Zek, and is not much of a threat when trapped; if it does hit the player, though, it can hit high. This monster can heal itself and other monsters when attacking. |
| 31 | 360 | 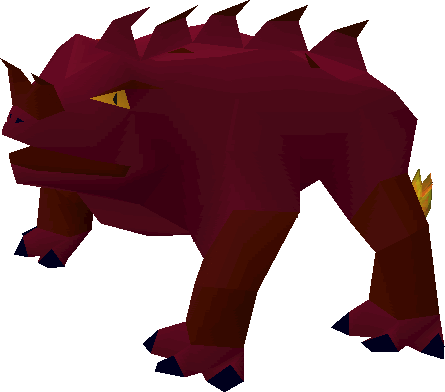 |
160 | File:Magic-icon.png Magic, File:Attack-icon.png Melee | 54 | A very large and dangerous monster - the player's third priority to kill. Whenever one is alive, the player must pray against its Magic attacks. Can kill a player in a few hits if it gets the chance. Use safespots combined with Prayer to fully block their damage. When in melee range, it will use both Magic and Melee attacks. These can be used in the later waves to block the Yt-MejKots. Be very cautious, for the Ket-Zek's Melee attack is also capable of dealing very high damage. |
| 63 | 702 |  |
255 | File:Attack-icon.png Melee, File:Magic-icon.png Magic, File:Ranged-icon.png Ranged | 97 | The final boss of the Fight Cave. Uses Ranged, Magic and Melee attacks. Almost impossible to kill without using the correct prayers. See text for more details. |
| 63 | 108 |  |
60 | File:Attack-icon.png Melee | 14 | Four of them appear when TzTok-Jad is at half health to heal it; these must be killed or distracted. They can heal each other or themselves when in melee range like their cousin, the Yt-MejKot. If they heal TzTok-Jad back to full health before killed, they will spawn again. |
Footnotes
- ↑ 1.00 1.01 1.02 1.03 1.04 1.05 1.06 1.07 1.08 1.09 1.10 1.11 1.12 1.13 1.14 1.15 1.16 1.17 1.18 1.19 1.20 1.21 1.22 1.23 1.24 1.25 1.26 1.27 1.28 1.29 1.30 Always kill the fiery, bat-like, level-22 Tz-Kih first using a hit-and-run tactic to prevent its Prayer drain!
- ↑ 2.0 2.1 Activate Protect from Missiles against Tok-Xil if needed as its Ranged attack will be strong against a low level or mage.
- ↑ 3.0 3.1 3.2 3.3 3.4 3.5 Use smaller monsters, Italy Rock or Dragon Rock to block the towering Yt-MejKot. See this map!
- ↑ 4.00 4.01 4.02 4.03 4.04 4.05 4.06 4.07 4.08 4.09 4.10 4.11 4.12 4.13 4.14 When the Yt-MejKot appears, use the Ket-Zek and other monsters to block it.
TzTok-Jad
TzTok-Jad is the final monster encountered in the Fight Cave. Examining it yields the discouraging message "This is going to hurt...". Which, when done incorrectly is very true. It is one of the highest levelled monsters in all of OldSchool RuneScape that players can fight with conventional methods. Defeating TzTok-Jad requires a huge amount of persistence and determination.
General information
In order for one to reach TzTok-Jad, one must first fight 62 progressively tougher waves of monsters. The current wave that the player is on is shown at the beginning of each wave. TzTok-Jad himself is a level 702, huge, four-legged behemoth and uses all three sides of the combat triangle - Magic, Ranged and Melee. TzTok-Jad will attack with Melee only when the player is adjacent to him. When the player is in melee range, TzTok-Jad will use Magic and Ranged attacks as well. If the player attacks from a distance - which is strongly recommended - TzTok-Jad will alternate between Magic and Ranged attacks. During the fight, the player should have auto retaliate on and focus on switching to the correct protection prayer in time. Even when the Yt-HurKots appear or the player gets hit, switching prayers is the most important thing to do. If you wish to take a break before TzTok-Jad, do not attempt to log out on wave 62, the wave preceding Jad. If you log out after you have completed wave 62, you will spawn in the middle of the fight cave, and you will only be able to do one action before he spawns. Instead, attempt to log out on wave 61, finish the wave, set your quick prayer to protect from missiles, and logout. When you log back in, you will be facing two Ket-Zeks, and you will have plenty of time to prepare yourself for TzTok-Jad. Do not hit continue in the chat dialogue. Instead, turn on your quick prayer. This will begin the wave.
Attacks
Jad slams his feet to the ground for Ranged, and he rears up dangling his feet for Magic.
Survival depends on watching TzTok-Jad's movements - an emote precedes the attack, telling the player which protection prayer to use.
- Melee: TzTok-Jad slams his fist into the player. This is the fastest attack, but if the player stays at a distance, they should not encounter it. Please note that this attack has no warning for you to pray for.
- Magic: TzTok-Jad will rear up, standing up straight and will begin to breath fire after about half a second. You can hear him inhale/growl loudly, (the sound of Retribution's effect activating) while rearing up and before he actually attacks, so listen for it. Protect from Magic needs to be activated while he's rearing up as after he begins to breath fire it will be too late, and you will be hit.
- Ranged: TzTok-Jad slams his front legs onto the ground, and large cracks appear in the floor at his feet - the player must turn on their Prayer now. Next, a boulder will fall down on the player. The sound from this attack only occurs AFTER the hit has been registered, meaning you must have your prayer on beforehand, it is recommended you have this prayer on when the wave starts, as you may not be able to see Jad before it is too late. (If you hear the magic sound you can always swap prayers.)
Although somewhat slow, all of these attacks can deal enough damage in a single blow to kill even the most powerful of players if not guarded by use of the correct protection prayer. TzTok-Jad has a maximum hit of 98 with Melee and 97 with Magic and Ranged and hits very accurately.
Healers
When TzTok-Jad is down to half health, he will summon four Yt-HurKots (level 108 Melee fighters with 60 HP and tiny in comparison), which will heal him effectively causing him to regenerate endlessly until they are dealt with. In order to stop them from healing, they need to be hit once so they turn their attention to the player. The Yt-HurKots' Melee attacks hit up to 14, so the player could kill them, but if one has a decent Defence level and good equipment, they should not be extremely dangerous - one should always watch their health, though. Alternatively, when all of the Yt-HurKots are attacking the player, run through TzTok-Jad and they will become trapped behind him. This is not advised unless the player is experienced. (Technique only works if East-West or vice-versa.) If they healed TzTok-Jad back to full health(Confirm?) and are then killed, they will respawn; otherwise, not.
It is NOT advised to tank the healers as each healer that is in combat with you still has the ability to heal Jad. (some people like to line the healers and only tank one; leaving only one healer able to heal Jad and simply outhitting it.) If the healers appear on the opposite site of TzTok-Jad and the player is using a ranged weapon, then it might be advisable to set the attack stance to long range, so as to ensure the player doesn't get in melee distance of TzTok-Jad when trying to hit the healers.
Notes:
- When the Yt-HurKots appear and before attacking them with a Ranged weapon to distract them, the player is advised to set the attack style to long range. Otherwise, he or she may walk too close to TzTok-Jad and get hit by his Melee attack.
- If the player gets hit by TzTok-Jad, they should not panic or consume a large amount of food or potions in one go. Stay calm and focused. Heal once every time he attacks while prioritising praying first.
- You will need to get the attention of all the healers; its most likely that even if you leave one healing him by the time it takes you to kill the other three healers, Jad will be at full health.
Logging out
It is possible to log out and save one's progress in the Fight Cave. In order to do this, the player should click the logout button once. The game will register that the player wants to log out, and two red messages in the chat box telling the player they will be logged out as soon as the current wave ends. The player should now kill all the monsters in the current wave after which have an opportunity to log out safely. When they next log in, they will start on the next wave. You can also logout regularly if you're not in combat for 10 seconds, or x-log if you have enough prayer to not die before you logout completely. This can be abused on Wave 62 for a better Jad spawn. The orange mage shows you where Jad spawns, and if you logout on this wave their spawn points will then get randomly chosen out of the 7 possible. This can be done repeatedly until the player gets the spawn point they desire to make fighting Jad easier.
If the player clicks the logout button twice, or avoids all combat for 10 seconds while there are still monsters alive and then logs out, his or her progress will be saved, but he or she will have to start from the beginning of the wave he or she logged out on.
The wave will not start immediately; however, the player will find his or herself in a conversation in which the creature who waits at the entrance to the caves is telling them to get ready to fight for their life, just the same as when he or she first entered the caves. The wave will not begin, nor will monsters spawn, until this message disappears as a result of the player doing something. This gives the player time to go into the Prayer tab and activate the necessary prayer, and quickly run from the centre of the room (which is where the player will be upon login) to his or her safe spot if need be before the monsters spawn. This is usually not too dangerous although it is somewhat risky, so it is always better to stay logged in while in the caves unless absolutely necessary.